|
Reproduce your paintings and watercolor images with copywork and large format Giclee printing from Cooksey-Talbott Studio in Fremont CA..
- High resolution digital copywork
- Match print service to create a color accurate copy of your art from a digital original.
- Polarized lighting to eliminate glare.
- Variety of traditional as well as non-traditional media -Canvas, Watercolor, Luster and Smooth Fine Art.
Step 1 – Getting Your Work Photographed…
There are several options here and some are better and naturally more expensive then others.
Basic digital copies are 42mp, this format will support prints to 40". High resolution digital images over 100mp can be made to support larger print sizes.
You can change the size of the work within limits. The limits are dependent on the nature of the piece but 80% to 120% of the original size is a reasonable expectation for a change that is imperceptible to the viewer.
Paintings like to be made smaller as it tightens the quality of the line edges. As a painting is made bigger the lines tend to fall apart due to the media texture in the original.
We use polarized lighting and camera filters to eliminate or reduce the glossy dots that can appear on the top of each thread in a painting. Matte paintings copy the best.
In each copy a standard color and gray-scale reference is included on the edge to make color matching easier.
Step 2 – Color Matching
Once the work has been photographed it is necessary to correct the digital master.
This can be done visually on the monitor, by correcting the color reference or by making repeated corrections and small match prints.
Making match prints is more accurate and more expensive.
If the painting and a prior match print are available we can match that print. Using the original painting as a color reference is always recommended.
Color is never quite a linear function and it is sometimes necessary to create a mask and alter one color in the painting to get a perfect match.
If you do not create a match print the Giclee reproduction will be close but it may not perfectly match the colors of your original. In many cases this is perfectly acceptable.
It is very possible to take a uncorrected file and make pleasing color however it is necessary to make a match print if you want the final reproduction to closely resemble the original’s colors.
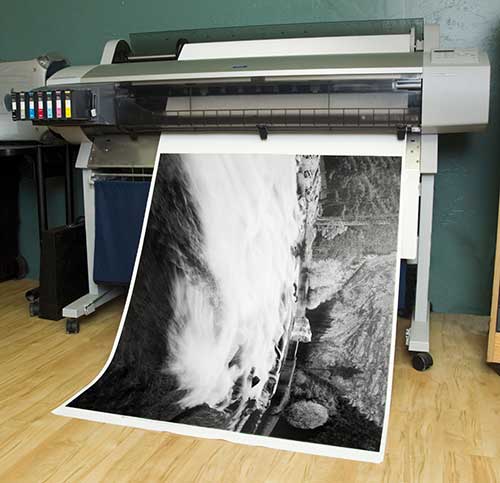
Step 3 – Output
Giclee prints are made on ink jet printers that use rolls or sheets of material. There is a wide variety of material available for fine artists making Giclee reproductions.
Wilhelm Institute or other test labs have archivally rated most of the materials for fine art.
We offer Smooth Fine Art, Textured 320gsm Watercolor, Satin Cotton Artists Canvas and others.
Prints on paper are finished after output. We recommend letting the prints out-gas for 24-36 hours prior to framing.
Prints on Canvas can be sprayed or laminated prior to stretching to make them more durable and less prone to cracking. I have been stretching unsprayed prints for a number of years and they are fine.
|